Showing posts with label blog. Show all posts

Tuesday, 18 August 2015

Guest writing for another blog and super cute DIY sign

Hello!!!!!
This blog post was originally written by me for a blog called Sophiesuite (https://sophiesuite.wordpress.com/), but I decided to give you guys a special preview before anyone else! It would be brilliant if all you crazy dinocorns out there would check her out!!


My good friend, Sophie - who I'm 95% sure is secretly my sister- invited me to guest write a page of her blog for her! Those of you avid bloggers out there will know that this is an enormous responsibility, imagine someone trusting you to read their diary or guard their secret stash of chocolate- that big! How could I turn down such an opportunity? 

The only brief I was given was to make my entry crafty, so after some brainstorming, I came up with the perfect DIY! This post will show you how I went about creating this super cute and sparkly sign. This project was really inexpensive and easy to do, it could be displayed on the back of your bedroom door or you could even attach a piece of dowel/a pencil to the back of it and place it in a vase. The possibilities are only limited by how far your imagination is willing to stretch!

To make your own, you'll need:

• A small, plain sign (I got mine off of amazon)
• Some PVA glue, you won't need much
• A pencil and black marker
• Some sparkly bits (eg. Glitter, sequins or gems)

1) Remove all of the labels and stickers from your sign.

2) Now draw or write out the outline of what you want on your sign- I chose the words "official unicorn".

3) I learnt that it's best to fill the words or design in with your marker at this point, as it is hard to apply marker on top of glue.

4) Spread glue on to one area of the sign at a time, it is much easier to apply glue to the sign and not to the back of each individual gem.

5) Place your gems (or other sparkly things) around the edge of your design and leave it to dry.

That's it! It really is as easy as that! If you try this DIY for yourself, be sure to send me a picture on Instagram (@unicornasauruss) I would love to see what you come up with, or you could share your master piece with Sophie on her tumblr (sophiesuite)

Happy crafting! 
xo~ Daisycorn

Thursday, 1 January 2015

I was vegan!!!

Hello everyone, this is Daisycorn.
So something not many people know about me, is that I once tried my hand at being a vegan! Needless to say my efforts didn't last long, partly down to my decision being very abrupt and spontaneous! All in all I lasted only a week in the vegan lifestyle but here are some of the things that I discovered whilst vegan :)
1| I felt much more awake, I was alert and not at all hungry during the whole experience!
2| I felt healthier- more "jumpy" and my stamina had improved also, almost instantly.

3| Did you know that many brands of Turkish delight are vegan?
4| Being a dairy loving person (milk, yogurt, cheese- you name it!) I was quite tempted by the odd glass of milk ect.
5| Dark chocolate is vegan!! (Allways check the label)
6| Hummus became my best friend!
7| The vegan lifestyle has its ups and downs but it was no where near as hard as I thought it would be.


The thing that ended my vegan lifestyle was visiting my local cheese market, I just couldn't resist! I urge anyone and everyone to try their hand at being a vegan- even if you fail miserably like me, it's still good fun trying!
Xo~ Daisycorn

DIY With Washi Tape 1 ~ Lipgloss

Daisycorn here! 
So recently I've fallen in love with a form of patterned paper tape known as "Washi Tape" (you've more than likely heard of it if you are as obsessed with YouTube as us)
  This is a quick DIY tutorial which is both practical and fun! I think all of us makeup lovers have been in that situation when that "cute" and "useful" transparent container has seen better days- here's an easy way to revamp your old favourite lip gloss; or other makeup product, to make it more appealing to look at!

Equipment:
                 -Lip gloss (near the end of it's life)
                 -Washi Tape (obviously ;-D)
                 -Scissors (not essential)
                 -PVA glue (also not essential)
Method: 
 1| lay out all of your equipment on your work surface area.
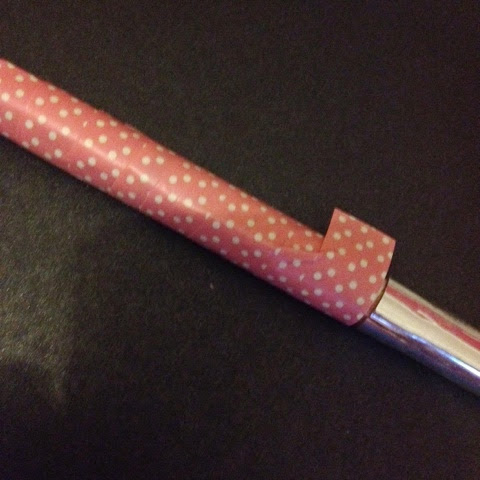
2| Starting from the bottom of the lip gloss, wrap the Washi Tape around horizontally, either tearing after each time the tape has gone once around, or wrapping at a slight angle.
3| Once at the top you could remove the lid and cover the lip gloss in PVA glue to create a "glossy" finish and protect the tape from tearing and water damaged. I skipped this step for the purpose of this tutorial.
4| Repeat with the lid in a different colour. (Not essential.)
5| The lip gloss is now ready for use; enjoy!!
xo~Daisycorn


New Year, New Blog!

Hello and welcome to the wonderful world of unicornasaurus! Unicorns and Dinosaurs are our favourite things (as you can tell). We will be posting lots of random posts about our lives, aswell as beauty, fashion, DIY's and many more awesome things! Stay tuned:)
xo-Amrasaurus and Daisycorn